
YouTube Shorts receive over 70 billion daily views, presenting an incredible opportunity for creators. However, standing out in a crowded feed requires polished, engaging, and professional content. Fortunately, you do not need expensive software like Premiere Pro or Final Cut Pro to create viral videos. CapCut offers all the advanced features required to produce high-converting Shorts directly from your phone or computer.
In this comprehensive guide, you will learn how to edit professional YouTube Shorts in CapCut from start to finish. Furthermore, we will explore key settings, viral editing techniques, and export options to ensure your videos get maximum reach.
Why CapCut Is the Best Editor for YouTube Shorts
Choosing the right video editor directly impacts your workflow speed and video quality. Mobile creators need tools that deliver fast results without compromising output precision.
Key Benefits of Editing YouTube Shorts in CapCut
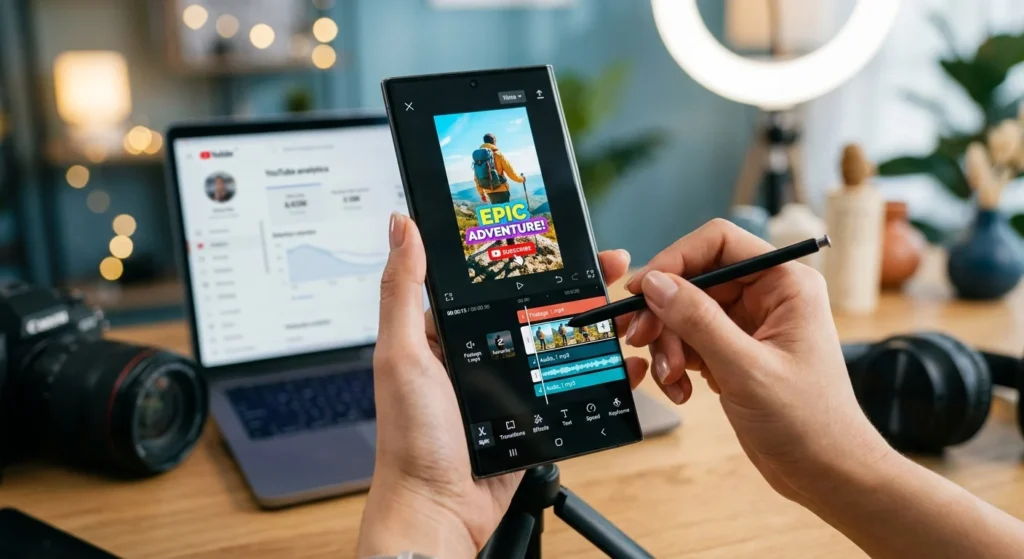
CapCut combines power and simplicity into an intuitive interface. Unlike traditional editing software, it streamlines complex actions into single-tap functions. You can apply transitions, keyframes, motion tracking, and color adjustments effortlessly. Consequently, your editing time decreases significantly while your production value increases.
Free Features vs Professional Desktop Alternatives
Most desktop video editors cost hundreds of dollars annually or require heavy system resources. In contrast, CapCut provides high-end tools like chroma key, background removal, and auto-captions completely free. Additionally, its seamless cloud integration lets you start editing on your smartphone and finalize your project on a desktop.
Project Setup: Aspect Ratio, Resolution, and Frame Rates
Setting up your project correctly prevents quality loss and awkward cropping issues on mobile screens.
Setting Up the Perfect 9:16 Vertical Canvas
YouTube Shorts strictly require a vertical 9:16 aspect ratio. When you open a new project in CapCut, tap on Format or Canvas Ratio and select 9:16. If your source footage was shot horizontally (16:9), scale the clip to fill the canvas or apply a blurred background canvas underneath.
Recommended Resolution, FPS, and Bitrate Settings
Always import and edit your source footage in the highest available quality. Set your project sequence to 1080p (1080×1920) or 4K resolution. Additionally, set your frame rate to 30 FPS or 60 FPS for smooth motion. Avoid exporting at lower frame rates because mobile displays reward fluid motion playback.
Step-by-Step Guide: How to Edit Professional YouTube Shorts in CapCut
Creating a successful Short requires structure, precise pacing, and visual polish. Follow these essential steps to transform raw footage into professional content.
Step 1: Crafting an Attention-Grabbing Visual Hook
The first 3 seconds of your Short determine whether a viewer stays or swipes away. Therefore, trim dead air, silences, or slow intro speech immediately. Place your strongest visual or statement right at the frame start. Furthermore, add quick camera zooms or text pop-ups during these opening seconds to hook viewer attention instantly.
Step 2: Trimming, Cutting, and Jump Cut Mastery
Pacing drives retention on short-form video platforms. Use the Split tool to cut out every pause, stutter, or unnecessary breath in your voiceover. Fast jump cuts keep the visual momentum high. As a result, viewers remain engaged throughout the entire video sequence.
Step 3: Adding Dynamic AI Auto Captions and Text
Over 70% of social media users watch videos with the sound turned off. Because of this, captions are essential for retention. Navigate to Text > Auto Captions in CapCut to generate subtitles automatically. Afterwards, style your captions using bold fonts, bright yellow or green highlight colors, and text animations that bounce on screen word-by-word.
Step 4: Using B-Roll Footage, Overlays, and Sticker Graphics
Talking-head videos become boring if the visual scene stays static. To fix this, overlay relevant B-roll footage, stock videos, or animated stickers every 2 to 3 seconds. Tap Overlay > Add Overlay to layer secondary video clips over your main track. This technique breaks visual monotony and reinforces your core message effectively.
Step 5: Master Keyframe Animations and Smooth Motion
Keyframes allow you to animate static images, text elements, or video scale over time. Tap the diamond-shaped Keyframe icon on your selected clip to place a starting pin. Move forward on the timeline, adjust position or zoom, and CapCut will automatically generate a smooth camera slide or zoom effect between points.
Step 6: Audio Editing, Sound Effects, and Royalty-Free Music
Good audio accounts for 50% of your video quality. First, select your primary audio track and enable Noise Reduction to eliminate background hiss. Next, add subtle sound effects (such as swooshes, pop sounds, and paper rustles) to highlight text pop-ups and clip transitions. Finally, lower your background music volume so your main voiceover remains crisp and easy to hear.
Step 7: Color Grading, Filters, and Cinematic Adjustments
Raw smartphone video often looks flat or washed out under casual lighting. Select your video track, navigate to Adjust, and boost Saturation (+10), Contrast (+5), and Sharpen (+15). Furthermore, apply subtle cinematic filters to make your colors pop on vibrant OLED mobile displays.
Pro Techniques to Boost Retention and Go Viral
Beyond basic cutting, professional editors use strategic visual triggers to keep retention graphs high.
Creating Seamless Loops for Infinite Playback
YouTube Shorts play on a continuous loop. If you design your final video frame to connect smoothly into your very first frame, viewers will rewatch the beginning before realizing the video ended. To do this, start your video mid-sentence and finish the sentence in your closing frame.
Speed Ramping and Sound Effect Synchronization
Speed ramping adjusts clip velocities dynamically to build anticipation. Use CapCut’s Speed > Curve option to slow down impactful actions and accelerate setup frames. Match every speed shift with an appropriate sound effect to give your edits a punchy, professional rhythm.
Optimal Export Settings for YouTube Shorts
Exporting with incorrect settings causes YouTube’s compression algorithm to degrade your video quality.
Exporting Crisp 1080p/4K Video Without Loss
When your project is ready, tap the export arrow in the top right corner. Use the following recommended parameters:
- Resolution: 1080p (or 4K if shot in 4K)
- Frame Rate: 30 FPS or 60 FPS
- Codec: H.264
- Bitrate: High (or Recommended)
Common Mistakes to Avoid When Editing Shorts
Even experienced creators make simple editing errors that hurt video performance.
- Ignoring Safe Zones: Keep text and key graphics away from the bottom right corner where YouTube overlays the channel name, title, and subscribe buttons.
- Overusing Flashy Transitions: Excessive 3D transitions distract from your actual content. Stick to simple cuts, fast zooms, and subtle light leaks.
- Low Audio Levels: Quiet voiceovers cause viewers to scroll away immediately. Always normalize your main audio track.
Frequently Asked Questions (FAQs)
Conclusion
Editing professional YouTube Shorts in CapCut comes down to mastering fast pacing, clean visual structure, and high audio quality. By leveraging tools like AI auto captions, overlay graphics, keyframe zooms, and smooth color grading, you can create captivating vertical videos that hook viewers instantly. Implement these techniques today to level up your content strategy and grow your YouTube channel rapidly.