
Exporting crisp and buttery-smooth videos can feel challenging when social media platforms apply heavy compression. However, you can easily bypass blurriness and visual artifacts by choosing the right output configuration. Finding the exact CapCut 4K 60FPS high-quality export settings has quickly become essential for content creators on TikTok, Instagram Reels, and YouTube.
This comprehensive guide breaks down the best CapCut 4K 60FPS high-quality export settings for both mobile devices and desktop computers. Moreover, you will learn professional workflow secrets to maintain maximum clarity after uploading your files.
Why CapCut 4K 60FPS High-Quality Export Settings Matter for Social Media
High-resolution uploads provide your content with a noticeable edge in saturated feeds. When you render a video in 4K resolution (3840×2160 pixels), you preserve finer details like textures, sharp edges, and small text elements.
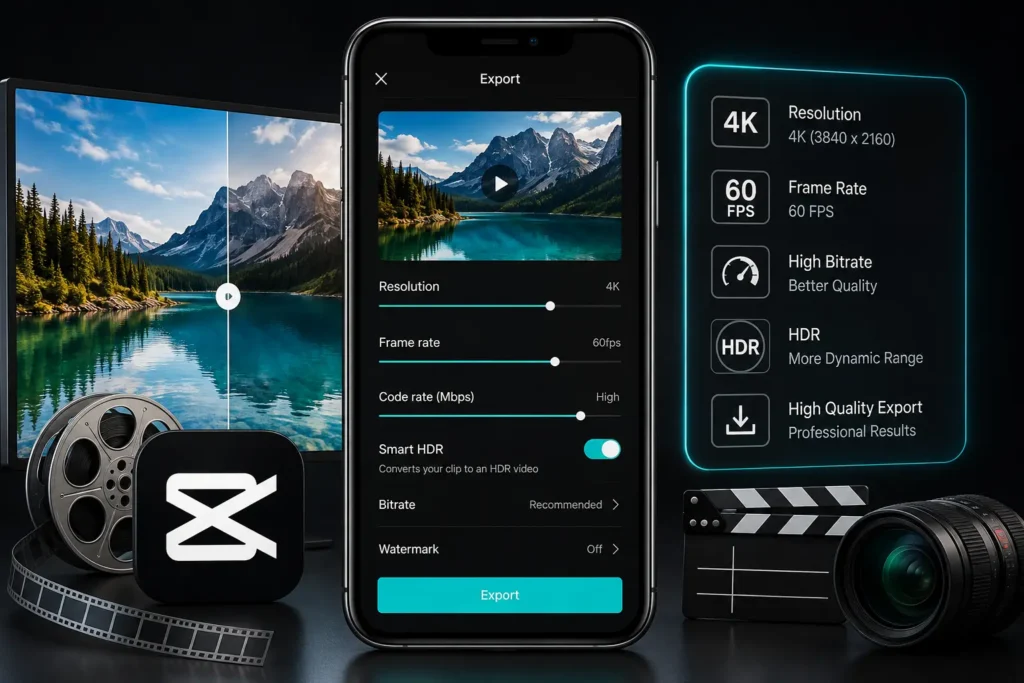
Additionally, rendering at 60 frames per second (FPS) doubles the visual fluidness compared to standard 30FPS footage. Consequently, fast movement, camera pans, and action clips look hyper-realistic and clear. Social media algorithms also favor higher-resolution submissions because they boost overall viewer watch time and engagement.
Prerequisites for Optimal CapCut 4K 60FPS High-Quality Export Settings
Before you adjust your final render options, you must prepare your source files correctly. High-quality exports always depend on high-quality input footage.
1. High-Resolution Source Footage
If you shoot in 720p or 1080p, scaling up to 4K inside CapCut will not add true missing pixels. Therefore, always record your camera footage in 4K or high-bitrate 1080p.
2. Matching Timeline Frame Rates
Ensure your project timeline frame rate matches your original media clips. If you mix 24FPS footage with 60FPS settings, CapCut duplicates frames, which causes stuttering.
3. Device Hardware Capabilities
Rendering 4K 60FPS video demands solid processing power and fast GPU encoding. Make sure your smartphone or PC has sufficient free internal storage and RAM before rendering heavy files.
Best Mobile CapCut 4K 60FPS High-Quality Export Settings (iOS & Android)
CapCut Mobile delivers impressive rendering tools right inside your smartphone app. However, hidden sliders can trip up beginner creators who leave settings on default automatic mode.
Follow this exact configuration on iPhone or Android for maximum clarity:
| Parameter | Recommended Setting | Purpose / Impact |
| Resolution | 2K / 4K (2160p) | Delivers maximum pixel density |
| Frame Rate | 60 FPS | Ensures smooth motion playback |
| Code Rate (Bitrate) | High / Custom (15-25 Mbps) | Prevents blocky compression artifacts |
| Format | MP4 | Ensures broad social media compatibility |
| Smart HDR | Off (Standard SDR) | Avoids color shifting on unsupported displays |
Step-by-Step Mobile Configuration Guide
- Open your finished video editing project inside CapCut Mobile.
- Locate the resolution box (e.g.,
1080P) near the top-right export button. - Drag the Resolution slider all the way to 4K.
- Drag the Frame Rate slider to 60.
- Move the Code Rate / Bitrate slider to High.
- Tap the Export Arrow and keep your screen awake until rendering finishes.
Ultimate PC CapCut 4K 60FPS High-Quality Export Settings (Windows & Mac)
CapCut Desktop provides deeper control over bitrates, video codecs, and hardware acceleration. Thus, PC users can achieve true broadcast-quality masters using these exact parameters.
Here is the ultimate desktop configuration:
1. Video Resolution
Select 4K (3840×2160) in the main video setup dropdown. This resolution provides 4 times the detail of basic HD footage.
2. Bitrate (Recommended vs. Custom)
Bitrate controls how much data CapCut uses per second of video.
- Select Higher from the preset list for fast rendering.
- Alternatively, pick Custom (CBR) and set a bitrate between 45 Mbps to 70 Mbps for intense motion clips.
3. Video Codec Selection
- Choose H.264 (MP4) for maximum platform compatibility and fast uploads.
- Select HEVC (H.265) if you want smaller file sizes without sacrificing visual detail.
4. Frame Rate Lock
Set the frame rate option to 60fps. This setting keeps high-motion action scenes looking smooth and fluid.
5. Format & Audio Options
- Format: Select
MP4(orMOVfor macOS users). - Audio Format: Select
AACat48 kHzsample rate for clean sound.
Platform-Specific CapCut 4K 60FPS High-Quality Export Settings Strategies
Every social media platform handles high-resolution video differently. Therefore, you should adapt your output strategy depending on where you post.
TikTok Optimization
TikTok compresses large files aggressively during upload. To keep your vertical 9:16 videos crisp, turn on “Allow high-quality uploads” inside your TikTok posting settings screen. Furthermore, exporting 1080p at 60fps with a high bitrate can sometimes render cleaner on TikTok than oversized 4K files.
Instagram Reels Optimization
Instagram downscales native 4K videos down to 1080p. However, applying proper CapCut 4K 60FPS high-quality export settings gives Instagram’s compression system a much cleaner source file. Always enable the “Upload at highest quality” toggle inside your Instagram account options.
YouTube & YouTube Shorts
YouTube handles 4K 60FPS content exceptionally well. When you upload 4K footage, YouTube assigns the superior VP09/AV1 codec to your video. As a result, your content maintains razor-sharp detail on desktop screens and smart TVs.
Advanced Editing Tricks to Complement Your CapCut 4K 60FPS High-Quality Export Settings
You can enhance video sharpness inside CapCut long before hitting the final export button. Apply these professional editing adjustments during post-production:
- Use the Adjust Tool: Select your clip, click Adjust, and boost Sharpen to around
10 - 15. - Fine-Tune Clarity: Raise Clarity slightly to
5 - 10for enhanced edge detail. - Contrast Adjustments: Increase Contrast by
3 - 5to make shadows and highlights pop. - Color Grading (HSL): Adjust the saturation of specific colors so your subjects pop against backgrounds.
- Denoise Low-Light Clips: Apply CapCut’s built-in Reduce Noise feature to eliminate digital grain on night shots.
Frequently Asked Questions (FAQs)
Conclusion
Mastering CapCut 4K 60FPS high-quality export settings ensures your videos look crisp, vibrant, and professional. Selecting 4K resolution, locking in 60 FPS, boosting bitrates, and adjusting video sharpness gives your content a major advantage on competitive feeds. Implement these exact settings on PC or mobile today to transform your social media video quality.